How to Wire a Boat Lift Switch to a Motor | Step-by-Step Guide
A well-organized switch panel is essential for efficiently operating the electrical system on boats. If the switch is properly connected, your boat lift will work as intended and safely, allowing you to easily raise and lower your boat into and out of the water.
This manual will step-by-step demonstrate how to connect a boat lift switch to a motor, providing you with the knowledge and confidence you need to complete this important task. No matter what your level of expertise is, you can install a boat lift switch following these instructions. So, let’s delve into it.

Tools and Materials Needed
- Screwdriver
- Wire strippers
- Wire connectors (butt connectors or soldering hardware)
- Marine-grade electrical wire (estimate and color according to your boat’s specifications)
- The marine switchboard or switchbox
- Motor and battery terminals
- Circuit breaker
- A Wire Cutter
- Battery Isolator
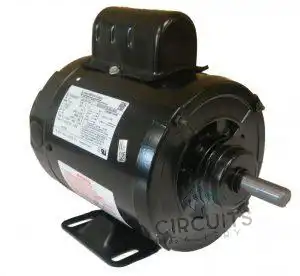
Figure 01: Lock-On Boat Lift Switch
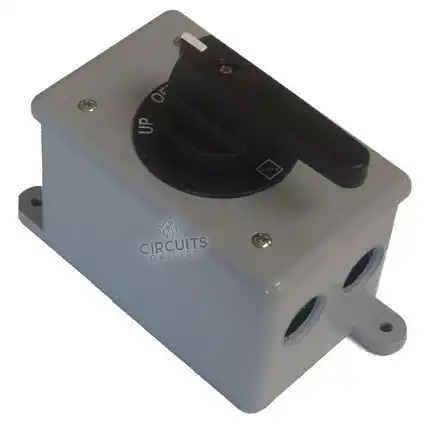
Figure 02: 1HP Boat Lift Motor
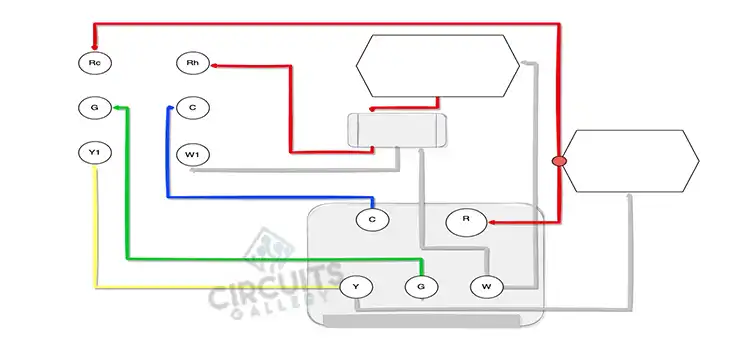
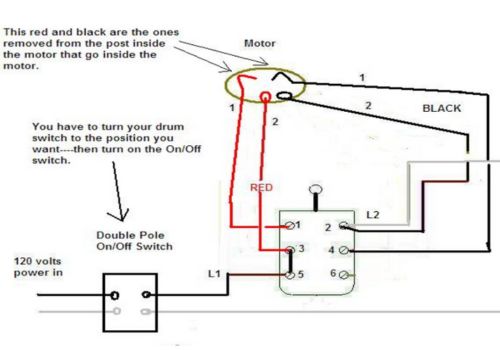
Boat Lift Switch to a Motor Wiring Diagram
Step-by-Step Guide to Wire a Boat Lift Switch to a Motor
Wiring a boat switch to a motor includes a few steps to ensure security and usefulness. Here’s a general step-by-step direction for the project.
Step 1: Disconnect Power
Ensure the boat’s electrical system is turned off, counting detaching the battery.
Step 2: Find the Motor and Switch Locations
Identify where the boat motor is found and where you need to install the switch.
Step 3: Prepare Wires
Measure and cut suitable lengths of marine-grade electrical wire to connect the motor to the switch. Make beyond any doubt you have got sufficient length for appropriate routing.
Step 4: Connect Wires to Motor
Strip the ends of the wires, and interface them to the motor terminals. Ordinarily, there will be a positive (+) and negative (-) terminal.
Step 5: Install the Switch
Mount the switch in your chosen location, guaranteeing it’s easily accessible and secured from the components.
Step 6: Wire the Switch
Interface one end of the wire from the motor’s positive terminal to one terminal on the switch and one end of the wire from the motor’s negative terminal to the boat’s common ground or battery’s negative terminal. Connect one end of the wire from the other switch terminal to the boat’s positive terminal or battery’s positive terminal.
Step 7: Secure Connections
Use suitable connectors (butt connectors, soldering) to ensure strong and secure connections. Heat shrink tubing can be utilized to ensure and insulate the connections.
Step 8: Check Wiring
Double-check that all associations are secure and that there are no free wires or uncovered conductors.
Step 9: Reconnect Battery
Reconnect the boat’s battery and guarantee there are no sparks or signs of electrical issues.
Step 10: Test the Switch
Turn on the switch and test the motor to guarantee it works as expected. Moreover, test turning it off to confirm that the switch controls the motor properly.
Step 11: Secure Wiring
Secure the wires and switchboard to avoid movement or harm during operation.
Step 12: Label and Record
Label the switch for simple identification, and consider recording the wiring for future reference or troubleshooting.
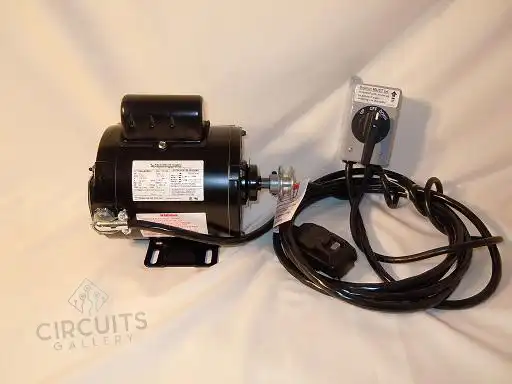
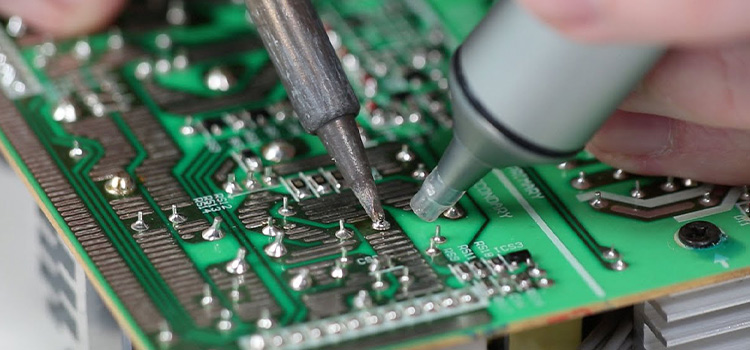
Figure 03: After Wiring the Boat Lift Switch to the Motor
Step 13: Security Check
Ensure all associations are insulated and protected from water exposure. Keep in mind that boat wiring ought to continuously follow marine electrical measures, and if you’re unsure about any step or the particular requirements of your boat, consult a marine electrician or professional to guarantee security and compliance.
Maintenance and Upkeep Tips
To keep your boat switchboard in ideal condition, follow these support tips:
1. Regularly assess the wiring connections and components for any signs of wear, erosion, or damage.
2. Clean the switchboard and switches frequently using a mild cleaner and a delicate cloth.
3. Test the functionality of the switches and electrical components before each sailing season.
4. Keep a record of the wiring chart and switch panel layout for future reference or
troubleshooting.
Frequently Asked Questions and Answers
1. How do I select the right boat lift switch for my setup?
It depends on the motor’s specifications and its wiring configuration to choose how you want a switch. Select the switch that is capable of handling the load, and check the motor’s voltage and amperage requirements.
2. What do I do in case my boat lift switch has more terminals than my motor?
Ask your switch’s manual or manufacturer for guidance if the switch has more terminals compared to a motor. For specific features or further wiring possibilities, supplementary terminals may be used.
3. What safety precautions should I take before starting the wiring preparation?
Detach the power source, put on protective gloves and goggles, and work in a dry area with no doubt. Always stick to the motor and switch according to the manufacturer’s instructions for your specific boat lift.
Conclusion
Finally, if done properly and with high attention to security and manufacturer demands, the wiring of a boat lift motor switch can be an invaluable do-it-yourself project. By selecting suitable components, using the correct wiring techniques, and carrying out regular maintenance, you can ensure the dependable and effective operation of your boat lift system for a very long time.
Subscribe to our newsletter
& plug into
the world of circuits