How to Program Door Popper Remote? Step-by-Step Guide
A door popper remote allows you to remotely open your vehicle’s door for convenient access. Door popper systems are commonly installed in custom cars and trucks to enable opening the door without exiting the vehicle. Programming these remotes to work with the door popper system is a straightforward process.
This article provides a comprehensive, step-by-step guide to programming door popper remotes for solenoid and linear actuator-based systems.
Understand Your Door Poppers
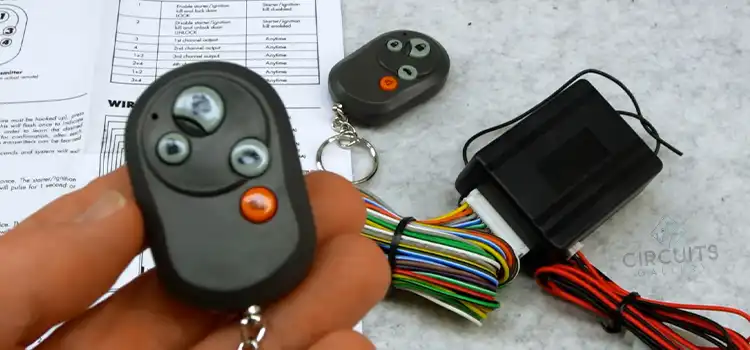
A door popper system consists of two main components – the remote transmitter and the door popper actuator. The remote transmitter is a handheld device that sends a coded RF signal to the receiver unit when a button is pressed. The receiver unit is wired to an electromechanical actuator, either a solenoid or linear actuator, mounted inside the door.
When the receiver gets the signal from the remote, it activates the actuator which then releases the door latch allowing the door to pop open.
Door popper systems offer convenience and easy access to your vehicle. They eliminate the need to manually open the door every time you want to get in or out. These systems are popular in street rods and custom cars, but can also be installed in standard production vehicles.
Gather the Necessary Tools
Before starting the programming process, ensure you have the following:
- The remote transmitter/key fob for your door popper system. If your system does not come with a remote, you will need to purchase a compatible one.
- Fresh batteries for the remote. A low battery can cause programming issues.
- The receiver unit for your door popper system. This is usually mounted under the dashboard.
- The door popper actuator solenoid or linear actuator.
- The door popper system is installed manually. This contains specific programming instructions.
- Basic hand tools like screwdrivers, wrenches, and wiring supplies.
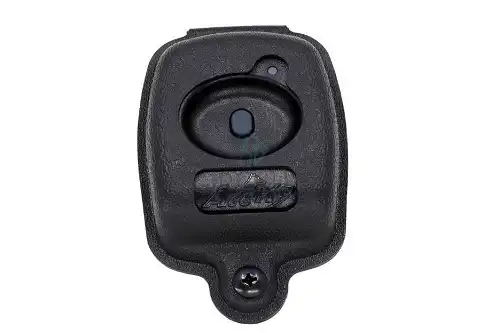
Identify Your Remote
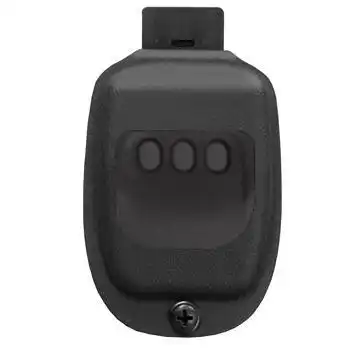
Door popper remotes come in a variety of styles including small keychain transmitters, fob-style remotes, and wireless RF pads. You need to identify the exact type of remote you have before programming. Key things to look for are:
- Buttons – Remotes can have one, two, or even four buttons.
- Battery type – Common types are CR2032 coin cell and A23 alkaline.
- Transmitter frequencies – 314 MHz, 318 MHz, and 433 MHz are typical.
- Code type – This can be dip switch, DIP, or rolling code.
- Brand name and model number on the back or inside.
This information will be needed for the programming process. If your remote is missing, contact the door popper manufacturer for a replacement.
Read the Manual
Each door popper system has its programming method. The instructions for your specific system will be provided in the user manual or install guide. Read this manual thoroughly before beginning. Pay attention to:
- Placement of the program button on the receiver unit.
- Type of feedback provided – light flashes, beeps, etc.
- Programming button presses and timing required.
- Instructions for adding multiple remotes.
Follow the manual precisely and do not skip any steps. Reading it ahead of time prevents mistakes. If you do not have the manual, check online or contact customer support.
Prepare the Door Popper System
Before programming the remote, ensure your door popper system is ready:
- Locate the receiver unit and identify the programming button on it.
- Make sure the receiver has power and any indicator lights are on.
- Have fresh batteries in the remote. A low battery can prevent programming.
- Open the target door so the popper can be tested during programming.
- Review the install manual and have all tools ready.
Do not start programming until you verify these steps. Have a helper assist if the receiver is hard to access.
Initiate Programming Mode
The steps to enter programming mode are:
- Press and hold the receiver’s program button for 3-5 seconds until the indicator light starts flashing.
- Release the button once the flashing starts. The receiver is now in program mode for 30-60 seconds.
- Within this time window, press the chosen remote button once firmly and release quickly.
- The receiver light will flash again or a beep will confirm programming.
If the light stays on steady, programming is not successful. Follow the manual and retry from step 1. Act promptly once the receiver enters program mode.
Program the Remote
To program the remote correctly:
- Decide which remote button will control the door popper. If unsure, use button 1.
- When the receiver light starts flashing, press and release the chosen remote button immediately.
- Do not hold the button down. Quickly press and release.
- If successful, the receiver light will blink again or a tone will sound.
- Repeat this process to program additional remotes to the receiver.
- Label the working remote buttons if using multiple remotes.
Pressing multiple buttons while in program mode can overwrite previous programming. Follow the steps precisely.
Test Operation
After programming, test remote operation:
- Close the target door that has the popper actuator.
- Press the programmed remote button and verify the door pops open.
- Test at short and long-range to ensure good reception.
- Try multiple times to confirm the consistent operation.
- Test any additional programmed remotes.
If the door does not pop open, recheck programming or adjust the popper actuator. The remote must reliably open the door before proceeding.
Troubleshooting Tips
If you encounter issues, try the following:
- Verify fresh batteries in the remote.
- Check for the correct programming button presses.
- Try reprogramming from a different location.
- Ensure the receiver and remote are within operating range.
- Check that the program button enables program mode.
- Inspect the door popper wiring and actuator.
- Look for external factors like antenna damage or low vehicle battery.
- Consult the installation manual and manufacturer’s tech support.
With patience, you can isolate and correct any programming difficulties. High-quality door popper systems will program reliably when instructions are followed precisely.
Frequently Asked Questions (FAQs)
Q1. Can I Program Multiple Remotes to the Same Door Popper System?
Answer: Yes, most door popper systems support programming multiple remotes to a single receiver unit. Individual remotes can have different buttons controlling the door.
Q2. How Often Does the Door Popper Remote Need to be Reprogrammed?
Answer: You typically won’t need to reprogram unless the remote is damaged or lost. Some systems may require reprogramming after changing batteries. Refer to your manual.
Q3. What if My Car Door Does Not Open When I Press the Remote?
Answer: Start by testing the battery, and range, and reprogramming from scratch. Also, inspect the door popper wiring and solenoid/actuator. Faulty installation or wire damage can prevent the system from working properly.
To Conclude
Programming a door popper remote is a quick and straightforward process when done methodically. By following the step-by-step instructions, you can easily set up your remote to reliably open the vehicle’s door.
Remember to prepare your tools, read the manual thoroughly, initiate programming mode correctly, test operation, and troubleshoot any issues that arise. With the convenience of a well-programmed remote, you will enjoy keyless entry to your vehicle.
Subscribe to our newsletter
& plug into
the world of circuits
![What to Do With Red Wire if Not Needed [Unraveling the Mysteries]](https://www.circuitsgallery.com/wp-content/uploads/2023/07/What-to-Do-With-Red-Wire-if-Not-Needed.jpg)